Tutorial: How to Knit a Twister Garter Cuff or Edging
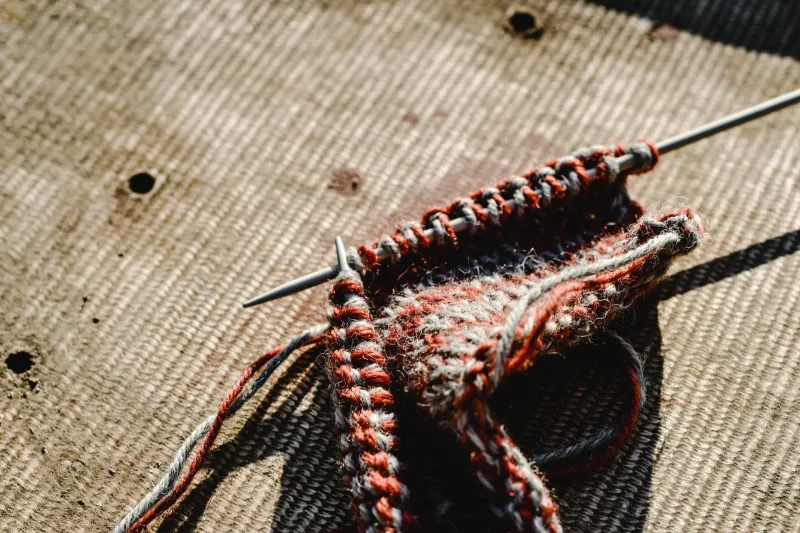
Okay, fellow yarn nerds — this one's been on my to-share list for a while, and I'm so glad I'm finally getting it out into the world. The twister garter cuff (sometimes called a twister garter edging) is one of those techniques that looks way more complicated than it actually is. Once you get the hang of the twist, you'll be adding it to everything. Socks, mittens, baby hats — you name it.
So grab your needles, pour yourself something warm, and let's dig in.
What Is a Twister Garter Cuff?
A twister garter cuff is a stretchy, slightly spiraling cuff or border made by combining a simple garter stitch base with a strategic yarn-over and twist technique. The result is a cuff that has a gentle, almost braided look to it — really beautiful at the top of a sock or the hem of a lightweight hat.
It lays flat, it's elastic, and honestly? It's just fun to knit. The rhythm of the twist row becomes almost meditative once you've done a few repeats.
What You'll Need
Before we get into the actual steps, here's what you'll want to have on hand:
- Your project yarn — any weight works, but this technique really shines in fingering or DK weight
- Appropriate needles — double-pointed needles (DPNs) or a short circular if you're working in the round
- A tapestry needle for weaving in ends
- Stitch markers (optional but helpful for tracking repeats)
- Basic knitting knowledge — you should be comfortable with knit stitches, purls, and yarn-overs
This tutorial assumes you're working in the round, since that's the most common use case (hello, sock cuffs!), but I'll note where things differ if you're working flat.
Cast On and Set Up
Start by casting on your desired number of stitches. For this technique to work cleanly, you'll want a stitch count that's a multiple of 4. So if you're making a standard sock cuff, something like 60 or 64 stitches works great.
Join to work in the round, being careful not to twist your cast-on edge. Place a stitch marker to mark the beginning of your round.
Rounds 1–4: Knit every stitch. This creates your garter base in the round (since garter in the round is actually knit one round, purl one round — but for this cuff, we're doing a modified version, so just knit every round for these first few).
Actually, let me clarify: for a true garter look in the round, you'd alternate knit and purl rounds. But for this cuff, we're going to let the twist row do the heavy lifting, so knitting every round for 4 rows gives you a nice stockinette base that will curl slightly and then get locked in by the twist.
The Twist Row — Here's Where the Magic Happens
This is the key step, so read through it once before you start knitting it.
Twist Round:
- Slip the first stitch purlwise with yarn in front.
- Move yarn to the back.
- Slip that same stitch back to the left needle.
- Now knit 2 together (the slipped stitch and the next stitch on the needle).
- Yarn over.
- Repeat from step 1 across the round.
What you're doing here is creating a little twist at every other stitch that pulls the fabric into that signature spiraling garter texture. It sounds fiddly, but after the first few repeats in the round, your hands will just know what to do.
After the twist round: Knit 4 plain rounds again.
Then work another twist round.
Repeat this sequence — 4 plain rounds, 1 twist round — until your cuff reaches your desired length. For a sock cuff, I usually do 3 twist rounds total, which gives me about an inch and a half of cuff. For a hat brim, you might want 4 or 5.
Working It Flat (For Edgings)
If you're using this as an edging on something flat — like the border of a blanket square or a scarf edge — the approach is almost the same, but you'll be working back and forth.
- Right side rows: Work the twist sequence as described above.
- Wrong side rows: Purl all stitches.
The twist only happens on right side rows, so you don't have to think about it every row. Easy.
Finishing Your Cuff
Once you've completed your final twist round and done a couple of plain knit rounds to stabilize the edge, you're ready to transition into the body of your project — whether that's the leg of a sock, the body of a hat, or whatever you're making.
If this is a standalone edging being sewn on, bind off loosely (I like a stretchy bind-off like the one where you knit 2 together through the back loop repeatedly — it keeps things nice and elastic), then seam it to your project using your tapestry needle and mattress stitch.
Weave in your ends, give it a gentle block if needed, and admire your work.
Tips From My Own Trial and Error
- Don't pull the twist too tight. The whole charm of this edging is its elasticity, and yanking on your yarn during the twist row will fight against that.
- Use a lifeline if you're nervous. Thread a piece of scrap yarn through your live stitches before you start the twist round the first time. If something goes sideways, you can rip back to that point without losing everything.
- Swatch it first if you're adding this to an existing pattern. The cuff can affect gauge at the transition point, so it's worth testing before you commit.
- It looks great in contrast colors. If you work the twist rows in a different color than your plain rounds, the spiral effect becomes even more visible and striking.
Why I Love This Technique
Honestly, the twister garter cuff is one of those little knitting details that makes people stop and say, wait, how did you do that? It's the kind of thing that looks like you put in way more effort than you actually did, which — let's be real — is kind of the dream.
It's also deeply satisfying to knit. The rhythm of the twist row has this almost puzzle-like quality to it that keeps your hands engaged without being so complicated that you can't watch TV at the same time. (And we all know TV-compatible knitting is a whole category unto itself.)
If you try this out, I'd love to see what you make! Drop a comment below or tag me if you share it anywhere. Happy knitting, friends. 🐢🧶